STEP BY STEP GUIDE OF KEIL SOFTWARE WORKING MANUAL WITH SCREEN SHOT
The steps or following
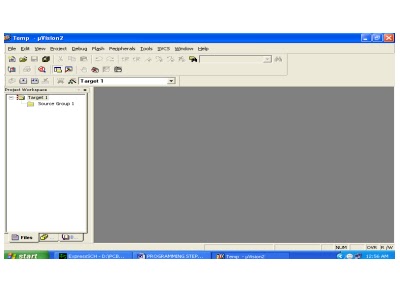
1.Click on the Keil u Vision Icon on Desktop.
2.Click on the Project menu from the title bar
3.Then Click on New Project

4.Save the Project by typing suitable project name with no extension in u r own folder sited in either C:\ or D:\

5.Then Click on Save button above.
6.Select the component for u r project. i.e. Atmel……
7.Click on the + Symbol beside of Atmel

8.Select AT89C51 as shown below

9.Then Click on “OK”
The Following fig will appear

10.Then Click either YES or NO………mostly “NO”
Now your project is ready to USE
11.Now double click on the Target1, you would get another option “Source group 1” as shown in next page.
12.Click on the file option from menu bar and select “new”

13.The next screen will be as shown in next page, and just maximize it by double clicking on its blue boarder.

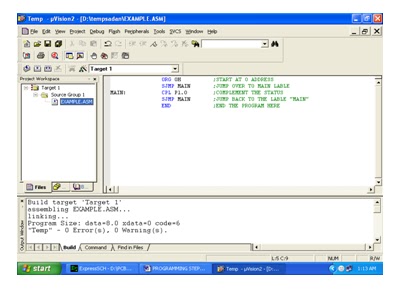
14.Now start writing program in either in “C” or “ASM”
For a program written in Assembly, then save it with extension “. asm” and for “C” based program save it with extension “ .C”

15.Now right click on Source group 1 and click on “Add files to Group Source”

Now you will get another window, on which by default “C” files will appear.

16.Now select as per your file extension given while saving the file
Click only one time on option “ADD”
Now Press function key F7 to compile. Any error will appear if so happen.
18.If the file contains no error, then press Control+F5 simultaneously.
The new window is as follows

19.Then Click “OK”
Now Click on the Peripherals from menu bar, and check your required port as shown in fig below

20.Drag the port a side and click in the program file.

21.Now keep Pressing function key “F11” slowly and observe.
You are running your program successfully
Click here to see the video tutorial of KEIL From Youtube
http://www.youtube.com/watch?v=g_UlJlyD4Kk
Click here to see the video tutorial of KEIL From Youtube
http://www.youtube.com/watch?v=g_UlJlyD4Kk

No comments:
Post a Comment